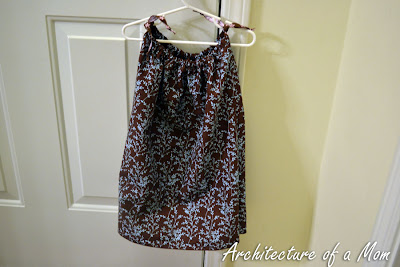
Bandana Shirt or Dress for a Child
5:30:00 AM
I've been wanting to create coordinating outfits for all 3 of my girls for some time now. I have seen so many pillow case dresses, and thought, that might work--straight seams, basic sewing--right up my alley. Then I heard about bandana dresses, which follow the same kind of method--straight seams, a ribbon through the top, and best yet--no hemming since the edges are already finished.
So I grabbed some bandanas the last time I was at a craft store, and I was off!
First, I washed the bandanas. You will want to do this to remove the stiffening agents that they put on them to make them nice and easy to package up. You will also (hopefully) cause any shrinking or fraying that will occur before you sew your project. Then you will need to iron the bandanas--one you wash them, they will be wrinkled.
Then you will need to line up the bandanas facing each other. If your bandana has directional pattern, make sure both bandana have the top at what will be the top of the dress. My little dress to be had this type of pattern. I didn't want those little branches facing down, or even worse, the back pointing down and the front pointing to the side! I then pinned the fabric together. I measure two inches from the bottom because I wanted a little side detail.
And she loves her new outfit, which is the most important part--makes up for the major fight I had with the sewing machine! Enjoy!


3 comments
Super cute and easy. I don't sew much, but I know three of my girls would love one of these! Thanks!
ReplyDeleteSo cute! What a fun dress for your little one!
ReplyDeleteSO cute! and pretty simple! Our little girls will love them! Thanks for linking up to "Strut Your Stuff Saturday!" We hope to see you again! -The Sisters
ReplyDelete